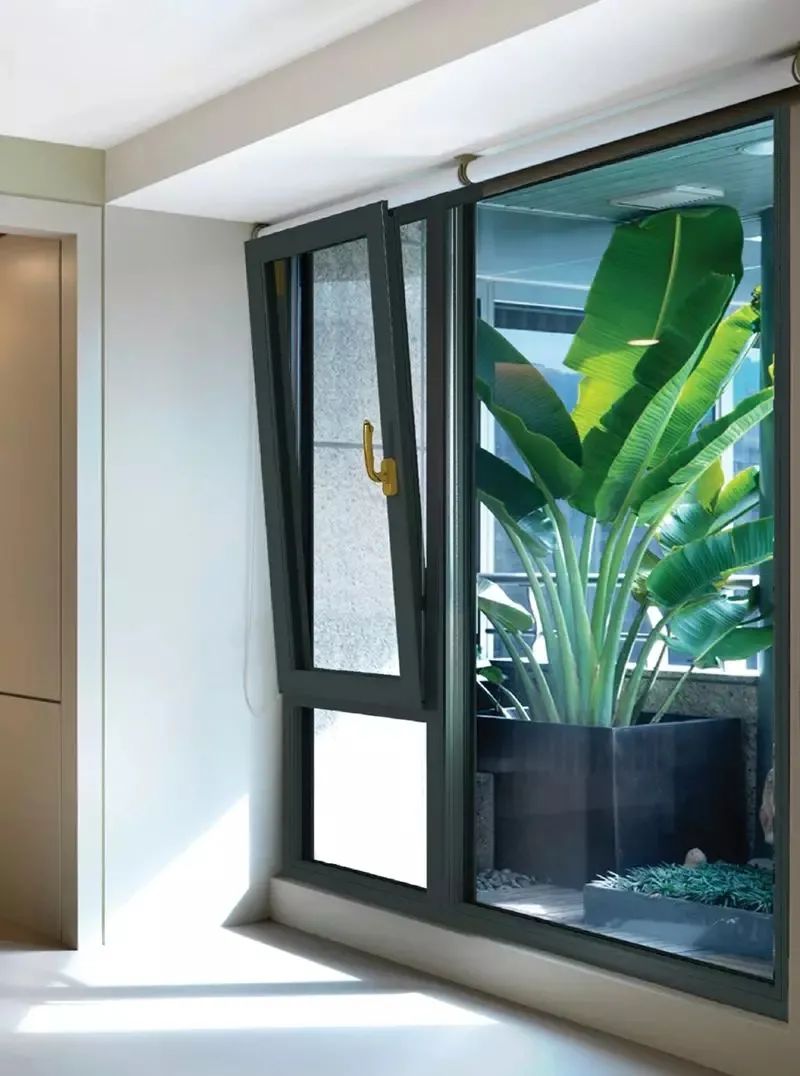
Why is immediate acceptance inspection required after installing a 55 Series single casement window?
The first 24 hours after installation are the golden period for acceptance inspection of the 55 Series single casement window. At this time, the foam adhesive between the window frame and the wall has not fully cured, and the sealant is still elastic, making it easier to adjust if problems are found. If this window is missed, the adhesive hardens and the structure becomes fixed, increasing the cost and time of later repairs.
The first 24 hours after installation are the golden period for acceptance inspection.
Within 24 hours of window frame installation, levelness and diagonal deviation can be corrected by fine-tuning hinges or locking blocks. Beyond this time, deformation of the window frame due to stress may cause the sash to not close properly or stick, requiring removal and reinstallation.
What common problems can acceptance inspection avoid?
- Window sash not closing tightly or sticking: When the installation deviation exceeds 2mm, the sash rubs against the frame and the locking points cannot align.Adjustment within 24 hours is simple;after one week, the window must be removed and reinstalled.
- Seal failure causing water leakage: If the foam filling is not full or the sealant has gaps, rainwater will seep in.During acceptance, use a spray bottle to simulate rainfall to detect leaks;if the wall becomes moldy, the wall must be scraped and the sealant reapplied.
- Loose glazing bead or fogging in the insulating glass unit: During transportation or installation, the glazing bead may shift, causing glass wobbling or air leakage.During acceptance, gently push the glass to check the glazing bead;Fogging in the insulating glass unit indicates seal failure, requiring immediate replacement of the glass assembly.
Immediate acceptance can avoid 80% of common issues, linking with articles on the same series such as "not closing tightly" and "water leakage" to ensure installation quality.
First item: Check the profile wall thickness and surface quality — does it meet the national standard of 1.4mm?
For the 55 series single casement window, the profile wall thickness directly determines the load-bearing capacity and long-term stability of the window frame. The national standard requires that the wall thickness of the main load-bearing member of the exterior window is not less than 1.4mm, which is also the value specified in the reference configuration of this product. During acceptance, you need to confirm whether the actual delivered profiles meet the standards, and also check the surface treatment quality.
How to measure the wall thickness of a profile with a caliper?
Tool: A vernier caliper or digital caliper with an accuracy of 0.02mm.
Measurement location: Do not measure the decorative surface or corner of the window frame; instead, choose themain load-bearing member—usually the vertical or horizontal frame of the window frameAt the opening of the section, i.e., the "web" or "edge groove" position of the profile. Specifically, on the side of the window frame (non-glazing bead side), locate the open end of the profile and clamp the caliper jaws at the thinnest wall thickness.
Operation steps:
- Clean the measurement point, removing dust or protective film.
- Keep the caliper perpendicular to the profile surface, gently clamp, and read the value.
- Measure at least3 different positions(For example, select one point on each side of the window frame: top, bottom, left, and right), and take the minimum value as the basis for judgment.
Judgment criteria: If the measured minimum value is ≥1.4mm, it is acceptable. If the measured value is between 1.35mm and 1.39mm, it is a slight deviation, but it is still necessary to confirm with the supplier whether it meets the contract requirements;If it is below 1.35mm, it is clearly non-compliant and should be replaced.
Key points for inspecting surface oxidation and scratches on profiles
Surface quality affects aesthetics and corrosion resistance. Pay attention to the following points during inspection:
- Oxide film uniformity: Visually inspect the surface of the profile; there should be no obvious color difference, whitening, or spots.Gently wipe with a finger; there should be no powder falling off.
- Scratches and dents: Slight, discontinuous fine scratches (length < 10mm, depth not damaging the oxide film) are allowed, butnot allowedare scratches, pits, or deformations with visible depth reaching the metal substrate.
- Protective film: Most profiles are covered with protective film when shipped from the factory. During acceptance inspection, first check whether the protective film is intact and undamaged.Peel off a small section to check if the surface under the film is clean, avoiding residual adhesive marks from the protective film.
Key trade-off: If there are a few minor scratches on the surface that do not affect the structure and are located on non-visible surfaces (such as the inside of the window frame), they can be accepted;If scratches appear on the exterior facade or are clearly deep, it is a quality issue and needs to be handled through negotiation.
Next confirmation action
- Confirm with the current website team: whether this batch of profiles is accompanied bymaterial certificates or factory inspection reports, whether the actual measured wall thickness is indicated in the report.
- If there is a difference between the on-site measured value and the indicated value, please provide measurement photos and location description, and the team will determine whether it meets the tolerance range agreed in the contract.
Second item: Glass configuration and seal inspection — is the 5+12A+5 insulating glass intact?
The reference glass configuration for the 55 Series single casement window is 5+12A+5, i.e., two layers of 5mm thick glass with a 12mm air layer in between. This configuration meets the daily needs of most residential and engineering projects in terms of sound insulation and thermal insulation. However, whether the glass is truly sealed intact directly determines the actual effect of the insulating layer — if the seal fails, the air layer will be exposed to moisture and fogging, and both sound insulation and thermal insulation will be greatly compromised.
Self-inspection method for hollow glass sealing
You don't need professional instruments; you can judge in three steps on site:
- Check the glass edge: The four sides of the hollow glass should havedouble sealing— the first layer is butyl rubber (black thin strip), and the second layer is polysulfide or silicone sealant (gray or black wide strip).If only one layer of sealant is visible, or if the sealant strip has cracks or missing parts, the sealing may not meet standards.
- Observe the interior of the glassIn a well-lit area, look at the middle layer of the glass from the side. If there is anywater mist, mold spots, or dust particles, the seal has failed.New windows should not have any foreign matter.
- Pressure test: Gently press the glass surface with your finger to feel if there isnoticeable wobblingIf the glass is loose in the frame, it indicates that the bead or weatherstripping is not installed properly.
Key Trade-off: If you find only one layer of sealant, or there are fog spots inside the glass,do not accept—this will lead to reduced sound insulation, glass fogging, and high maintenance costs later.You should directly contact the supplier for replacement or additional sealant.
Glass Bead and Weatherstripping Inspection
The glass bead (the frame that holds the glass) and the weatherstripping (the rubber strip between the bead and the glass) are the second line of defense for sealing.
- Weatherstrip: Check if it isflat and free from warping, and fits tightly against the window frame.Press the four corners with your hand; there should be no looseness or gaps.
- Seal strip material: Common materials includeEPDM (Ethylene Propylene Diene Monomer), silicone rubber and PVC.EPDM and silicone rubber have good elasticity, aging resistance, and long service life;PVC tends to harden and crack, so it is not recommended for long-term projects.The default configuration of 55 Series windows usually uses EPDM gaskets, butfor bulk orders, it is recommended to confirm the gasket material with the hyperstron teambecause different materials affect the sealing life and replacement cycle.
Suitable/Unsuitable Judgment:
- Suitable: If you need stable sound and thermal insulation, a long project cycle (over 5 years), and can accept standard configuration (5+12A+5+EPDM rubber strip).
- Not suitable: If your area experiences extreme temperature differences (such as severe cold or high temperature and humidity), or has higher requirements for sound insulation (such as a bedroom facing the street), the standard configuration may not be sufficient. It is recommended to upgrade to5+20A+5ortriple glazing with two cavitiesconfiguration—but this requires confirmation from the Hyperstron team on whether customization is supported.
Next confirmation action
- Confirm with the Hyperstron team: Does the window you received use EPDM rubber strips?Can you provide a material certificate for the sealing rubber strips?
- Check the order: Is the glass configuration consistent with the contract (5+12A+5)?If the project requires higher performance, ask about the price difference and delivery time for the upgraded configuration.
- Take photos on site for records: Take photos of the glass edges, beadings, and sealing rubber strips as acceptance records.
Item 3: Hardware and lock point inspection — Is the opening and closing smooth? Are there enough lock points?
Hardware is the core of daily window use, directly affecting the switching feel, sealing performance, and anti-theft capability. For the 55 Series single casement window, focus on two key points during acceptance:Smoothness of the handle and hinges、Number and position of locking points。
Check the smoothness of the handle and hinges
- Handle switch testRotate the handle 90 degrees from the closed position to the open position, then rotate it back in the opposite direction. The normal feel should beSmooth, no jamming, no abnormal noise. If it cannot be turned or requires significant force to turn, possible reasons include:
- The transmission rod and lock point are not aligned (installation deviation)
- Debris or burrs inside the lock point or transmission slot
- Quality issue with the handle itself (rare)
Next step: If it cannot be turned, first check whether the lock point is stuck outside the slot, then clean the transmission slot. If the problem persists, contact the installer or confirm with the Hyperstron team the matching solution for the handle model and window sash.
- Hinge inspection: Open the sash to 90 degrees and observe whether the sash naturally sags or tilts.Shake the sash up and down with your hand to feel if the gap is even.Acceptance criteria: When the sash is in the open position,there is no obvious sagging, and after closing, the gap between the sash and the frame is even all around (≤2mm).If the gap is large on one side and small on the other, it indicates that the hinge is not installed level or the sash is deformed.
Lock point quantity and position verification
The number of locking points for a 55 series single casement window depends on the sash size and wind load resistance requirements. Reference configuration (1000×1000mm) typically configured with2-3 locking points, distributed on the handle side (on the transmission bar) and the hinge side (anti-misoperation locking point). During acceptance:
- Count the number of locking points: There should be at least 2 locking points on the transmission bar on the handle side (one at the top and one at the bottom), and 1 anti-misoperation locking point on the hinge side.If the sash width exceeds 1200mm, it is recommended to increase to 3-4 locking points.
- Check locking point engagement: After closing the window, push the four corners of the sash by hand to feel if there is obvious shaking.If the shaking exceeds 3mm, it indicates that the locking points are not tightly engaged or insufficient in number.
- Check alignment: The locking point should be directly opposite the center of the lock strike, with a deviation not exceeding 1mm.Excessive deviation can cause poor sealing or difficulty in opening and closing.
Key Trade-off: More locking points does not necessarily mean better—locking points must match the sash size and profile strength. For the 55 Series profile with a wall thickness of 1.4mm, 2-3 locking points are sufficient under standard dimensions. If the project is located in a high wind pressure area (such as coastal high-rise buildings), you can confirm with the hyperstron team whether additional locking points or upgraded hardware configurations are supported.
Frequently Asked Questions
Q1: Can the handle of the 55 Series single casement window be replaced later? Yes. The handle is a universal part, but the length of the transmission rod and the interface type need to be confirmed.
It is recommended to confirm the handle model with the hyperstron team before installation to avoid mismatch later.
Q2: Is more locking points always better? No. The number of locking points must match the window sash size, profile wall thickness, and wind pressure rating.
The standard configuration of 55 series with 2-3 locking points meets the requirements of most residential and commercial projects. Too many locking points will increase the resistance to opening and closing, and require higher profile strength.
Q3: What should I do if I find abnormal noise from the hinge during acceptance? First check whether the hinge screws are loose, and then confirm whether the hinge fully fits the profile groove. If the noise comes from inside the hinge (such as damaged balls), replace it with the same model hinge.
You can contact the hyperstron team to obtain the hinge specification parameters.
Q4: Is the "clicking" sound when turning the handle a quality issue? Not necessarily. It could be a normal sound caused by friction between the transmission rod and the lock point, or the lock point may be misaligned.
First, check if the lock point is stuck outside the lock seat groove, then clean the transmission groove. If the sound persists and is accompanied by jamming, it is recommended to adjust the lock point position.
Q5: Can a child safety lock be installed on a 55 Series single casement window? Yes. Most handles support the addition of a limiter or child safety lock, but it is necessary to confirm whether the handle model is compatible.
It is recommended to raise the requirement to the Hyperstron team during the ordering stage to avoid affecting the appearance or sealing performance due to later modifications.
Learn more
Installation acceptance is a key step to ensure the long-term performance of the 55 series single casement window.If you encounter any issues during the acceptance process, or need to verify the specific configuration of profiles, glass, and hardware, please feel free to contact the hyperstron team. We will assist you in confirming the plan and standards.
Related products:55 series single casement aluminum window