
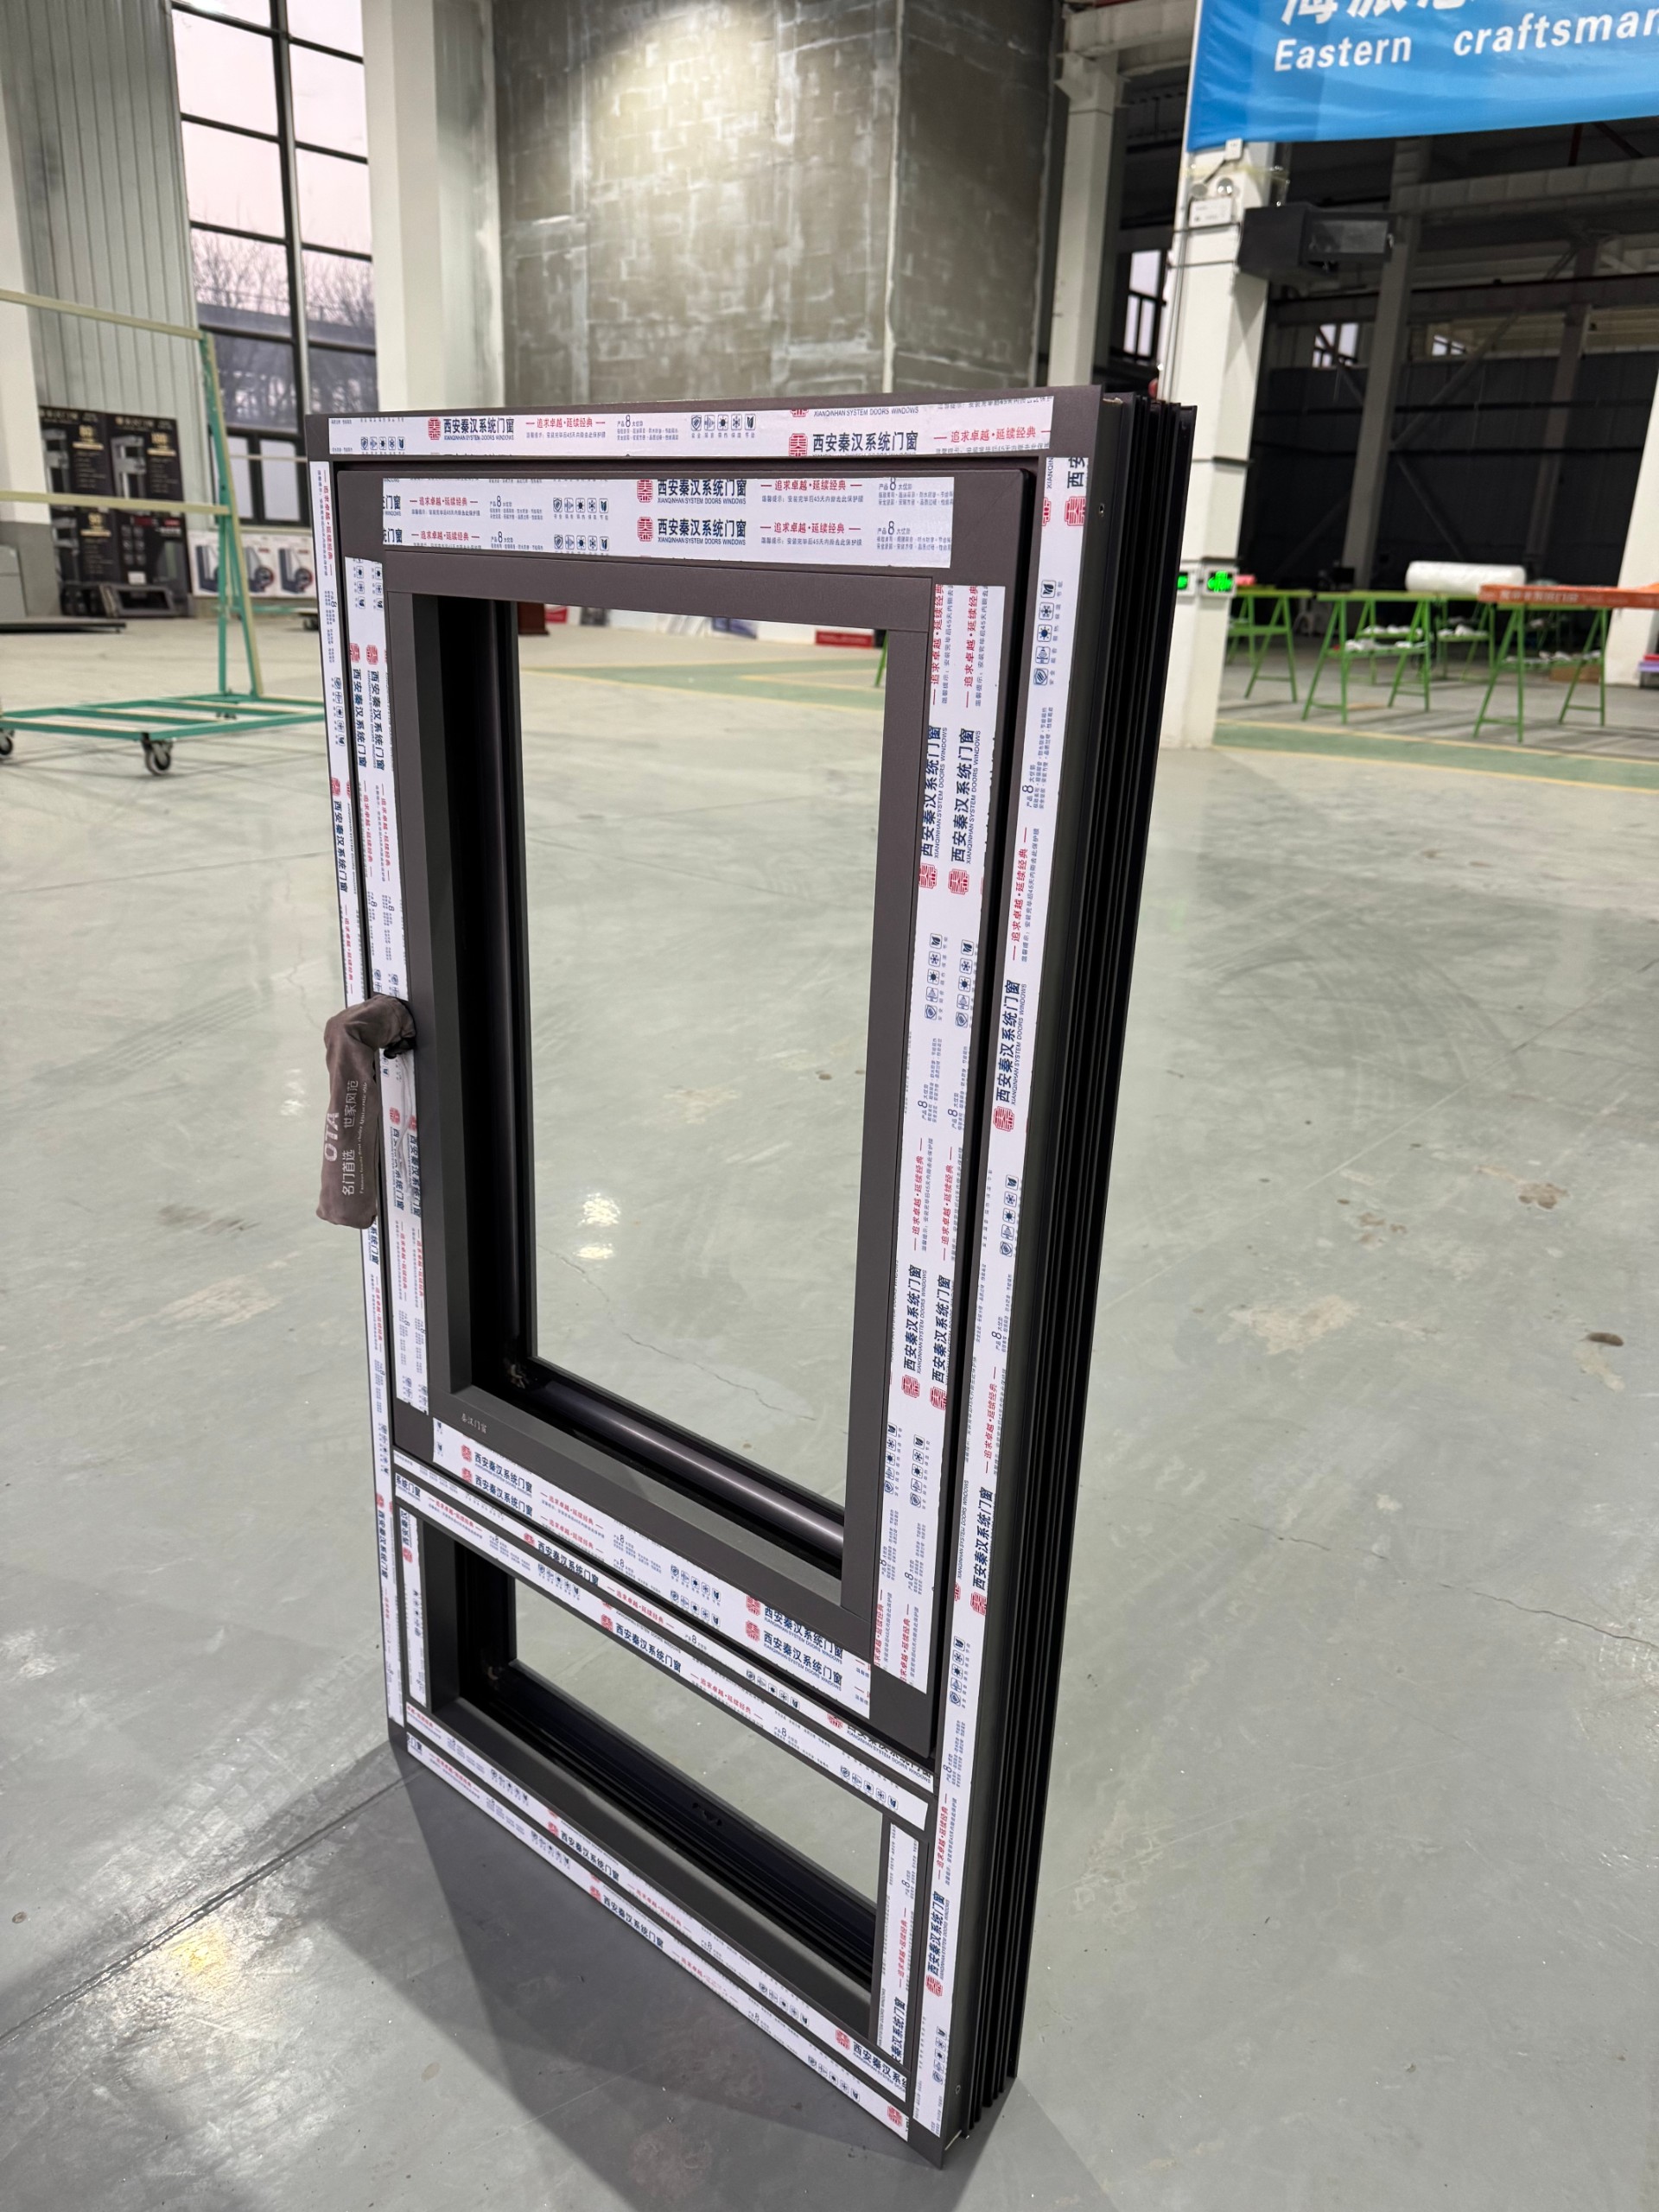
3 Things That Must Be Confirmed Before Installation: Opening, Wall, and Product Configuration
Most installation issues with the 80 Series reinforced single casement window are already rooted in the three stages of opening treatment, wall conditions, and product verification. The following explains each in order of impact.
Inspection of Opening Dimensions and Wall Conditions: Why Direct Installation Is Not Possible
How much deviation in opening dimensions requires treatment?
When using the reserved opening installation method, it is recommended to control the width and height deviation of the opening within ±5mm. If it exceeds this range, the excessively thick filling layer will cause uneven stress on the window frame, which may later lead to difficulty in opening and closing or deformation of the frame. When using the auxiliary frame installation method, the deviation can be relaxed to ±10mm, but the auxiliary frame must be calibrated with a level.
Can it be installed directly on uneven walls?
No. Direct installation on uneven walls can cause the window frame to twist, preventing the sealing strip from compressing evenly and increasing the risk of water and air leakage. Use a 2-meter straightedge against the wall around the opening to check; areas with gaps exceeding 3mm need treatment: for deviations of 3-8mm, local leveling is acceptable; for deviations over 8mm, overall plastering is recommended.
Additionally, hollow brick or aerated block walls have insufficient nail-holding strength, so steel liners should be embedded in advance or through-wall bolts should be used for fixing.
Verify product configuration: check whether the profile, wall thickness, and glass match the drawings.
The reference configuration for this product is6063-T5 aluminum alloy profile, 1.8mm wall thickness, 5+22A+5 insulating glassAfter arrival, check in the following order:
- Profile wall thicknessUse a caliper to measure the wall thickness of the load-bearing frame members (frame, mullion). The measured value should not be lower than the nominal value stated in the order.
- Glass configuration5+22A+5 means two 5mm glass panes with a 22mm air layer in between, with a total glass thickness of approximately 32mm (allowable deviation of ±1mm).This can be confirmed by measuring the width of the spacer bar at the glass edge or the total thickness.
- Profile materialConfirm that the surface anodized film or spray coating is intact, with no obvious scratches or color differences.
Suggestion: Before batch installation, install a sample window first, and have the project leader and the installation crew jointly confirm that the actual product matches the order, then proceed with large-scale installation to avoid rework of the entire batch.
Four key steps during installation: fixing, waterproofing, sealing, and adjustment
The installation quality of the 80 Series reinforced single casement window directly determines whether it can deliver the performance of the profile and glass configuration itself. With a profile wall thickness of 1.8mm and a glass configuration of 5+22A+5, the window sash is relatively heavy, making fixing and alignment during installation more sensitive than with ordinary thin-wall windows. The following breaks down the four key steps in the order of construction.
Window frame fixing and leveling: how to avoid frame deformation
The root cause of window frame deformation is usually excessive spacing between fixing points or uneven force distribution. For the 80 Series thickened profiles, the recommended spacing between fixing points should be controlled at400–500mm, and additional fixing points must be installed within 150mm on both sides of corners and mullion joints. When the spacing exceeds 600mm, the window frame is prone to deflection under wind pressure or the weight of the sash, which later manifests as poor closure and uneven compression of the weatherstripping.
The key to horizontal leveling isadjust the frame first, then secure it。 Use wooden wedges or dedicated shims to temporarily support the frame at the bottom, adjust the levelness and verticality (with a deviation of no more than 2mm per meter), and confirm that the diagonal error is within the allowable range before driving in the fasteners. The fastening sequence should proceed alternately from the middle toward both ends to avoid frame distortion caused by locking one side first.
Note: Thickened profiles are more rigid. Forcibly using fixing screws to "pull" the frame straight can instead cause localized stress concentration, which may lead to slight deformation of the profile after long-term use.
Waterproofing layer and sealant application: How to control leakage risks
Nine out of ten leakage problems occur at the junction of two processes: the waterproofing layer is not continuous, or the sealant is applied on a damp or oily surface.
Waterproofing layer construction sequence:
- After the window frame is installed and fixed, first clean the base layer of the opening and repair any uneven areas
- Apply the first waterproofing layer at the joint between the window frame and the wall. It is recommended to use waterproof mortar or polymer cement-based coating, with a width covering at least 30mm on each side of the joint
- After the first waterproofing layer is surface-dry, apply sealant as the second line of defense
The method of applying sealant directly determines the waterproofing effect:
- The glue joint width should be controlled at5–8mm, and the depth should not be less than half of the width.If the glue joint is too narrow, it is prone to cracking under temperature changes; if too wide, the internal stress in the adhesive will be excessive.
- Before applying the sealant, ensure the substrate is dry, free of dust, and free of oil.Applying sealant on rainy days or when the substrate is damp will significantly reduce the bonding strength between the sealant and the profile, which is the most common hidden cause of later water seepage.
- Adopta continuous and uniform application from inside to outsideApply it by squeezing, then compact with a scraper to expel air, ensuring the sealant fully contacts the substrates on both sides.
- Do not break the bead at corners; complete it in one continuous pass.If a joint is necessary, overlap the joint by at least 10mm.
Where should the setting blocks be placed during glass installation?
The placement of glass setting blocks is often overlooked, but it directly affects the glass's stress distribution and sealing performance. For 80 Series casement windows, the setting blocks should be placedat both ends of the glass bottom, approximately 1/4 of the window width from the corners, not in the center or flush against the corners. The load-bearing support block width shall be no less than 50 mm, and its thickness shall be adjusted according to the depth of the frame groove to ensure the glass is centered and embedded without direct contact with the metal frame.
Positioning support blocks must be added on both sides to prevent horizontal movement of the glass. Note: The support blocks should be made of rigid PVC or special rubber blocks. The use of wooden blocks is strictly prohibited—wood can expand when damp, generating localized pressure that is one of the causes of spontaneous glass breakage. After installing the glass, check that the gaps around it are uniform, then insert the gasket or apply sealant to secure it.
Adjustment: Window sash operation and lock point engagement
The final step is adjustment, but many installation teams skip it. After installing the window sash, check whether the opening and closing force is uniform and whether the lock points are fully engaged. If one corner of the sash sags or the sash does not close tightly, first check whether the frame is level, then adjust the vertical and horizontal positions of the hinges or pivots.
When the locking point engagement depth is insufficient, the weatherstripping cannot be fully compressed, compromising sound insulation and thermal performance—which is especially regrettable in this product's 5+22A+5 configuration, because the glass itself has excellent thermal insulation, but a failed seal prevents it from performing.
Section summary: Fixed-point spacing of 400–500mm, frame adjustment before fixing, continuous waterproofing layer application, sealant applied on dry surfaces, and shims placed at 1/4 of the distance from the corners—these five key points are the steps with the highest rework rates in the installation of 80-series reinforced single casement windows. If your project's opening conditions are special (such as poor wall flatness or large deviations in the reserved opening), you need to confirm with the current website team whether a matching opening treatment plan or a dedicated auxiliary frame is required.
Post-installation acceptance and common error avoidance: 5 details most easily overlooked
Installing the window is not the same as completing acceptance. Most after-sales issues—water seepage, difficulty in opening, abnormal noises—stem from a few inconspicuous details during the installation phase. Below, in order of acceptance sequence and error frequency, are actionable self-inspection methods.
Acceptance Criteria: How to Check Sealing, Opening Force, and Drainage
Sealing Check: Don't just look at whether the weatherstrip is intact. Place a sheet of A4 paper between the sash and the frame, close the locking points, and try to pull it out. If the paper meets noticeable resistance when pulled out, without obvious sliding, it indicates that the compression of the weatherstrip is basically adequate.
If the paper slides out easily, it means the weatherstrip is not effectively compressed; you need to adjust the position of the locking points or check whether the weatherstrip is too thin. Additionally, with the sash closed, run your hand along the outer side of the weatherstrip, paying special attention to any 'break' feeling at the corners—corners are where the weatherstrip is spliced and are the most prone to air leakage.
Opening Force Check: The opening force of a casement window should be uniform, not just 'as long as it closes'. The normal feel is: when opening, there is slight damping from the locked to released state, but no forceful pulling is required;When closed, the locking points should enter the strike plates smoothly, without needing to press down or lift the sash to lock. If there is a 'catch' during opening or closing, or if you need to change the direction of force, it indicates that the hardware is not installed on the same plane, which will accelerate wear over long-term use.
Drainage check: This is the most easily skipped step. Slowly pour water on the outside of the window frame (or near the drainage holes) and observe whether the water flows out smoothly from the drainage holes, rather than accumulating inside the frame material or seeping out from the interior side. Also confirm that the drainage holes are not blocked by foam or sealant used during installation—this is the most common hidden defect after installation.
Common mistakes checklist: 5 pitfalls from base treatment to hardware adjustment
- Fixing the window frame without a level base. If the wall opening is not leveled and the window frame is directly propped up with wooden wedges or shims, it can cause the frame to twist and deform.The consequences are: misaligned locking points, uneven compression of the weatherstrip, and stress concentration on the glass.During acceptance inspection, use a spirit level against the horizontal and vertical frames of the window; if the deviation exceeds 2mm/m, re-adjustment should be required.
- Excessive foam sealant applied and trimmed flat before it has cured. Expanding foam can bow the window frame after expansion, especially for large cross-section profiles like the 80 Series; deformation under stress is not easily noticeable.The correct approach is to fill in stages, leaving room for expansion, and trim only after curing.During acceptance, check for visible 'bulging' of the window frame or misalignment of locking points.
- The spacing of fixing brackets is too large or their positions are incorrect. Fixing brackets should be placed 150-200mm from corners, with intermediate spacing not exceeding 500mm.If the installer takes the easy way out and only fixes both ends, the wind pressure resistance will drop significantly, which is especially dangerous for high-rise projects.During acceptance, the fixing plates cannot be seen directly, but you can ask the installer about the number of fixing points and spot-check whether there are corresponding screw marks on the outside of the window frame.
- The drainage holes are sealed shut by sealant. Sealing the drainage holes while applying exterior sealant is a low-probability but serious issue.Poor drainage can cause rainwater to backflow into the room, or accumulate in the frame for a long time, accelerating hardware corrosion.During acceptance, check each hole one by one to confirm that the drainage holes are unobstructed.
- Hardware adjustment only adjusts the locking points but not the locking blocks. When the window sash sags or does not close tightly, installers often only tighten the locking point screws.But the offset position of the lock block is the common root cause.The correct adjustment sequence is: first check whether the sash is level and whether the hinges are evenly stressed, then adjust the lock block position, and finally fine-tune the lock point.If you skip the first two steps, the problem will recur.
The consequences of a blocked drainage hole deserve special emphasis: It will not leak immediately, but will manifest as 'moisture on the inside of the window frame after rain' or 'dampness on the wall below the windowsill'. Because the water cannot drain out, it will seep into the wall along the internal gaps of the profile, and by the time it is discovered, the base layer is often already damaged. This is also why the acceptance test must include an actual water pouring test, rather than just checking whether the drainage hole exists.
Next confirmation actions: If you are purchasing the hyperstron 80 Series thickened single-opening aluminum alloy window, confirm with the team before installation the location and quantity design of the drainage holes for this batch (which may vary with different wall thicknesses and glass configurations), and request installation precautions specific to this model—especially the spacing of fixing clips and the foam filling requirements, as these two directly affect whether the performance of the 1.8mm wall thickness profile can be fully utilized.
Installation differences across scenarios: What to note for residential, high-rise, and coastal projects?
The same 80 Series thickened single-opening aluminum alloy window, when installed in multi-story residential buildings, high-rise towers, and coastal villas, has completely different installation priorities. The difference is not in the window itself, but in the installation method, fixing nodes, and sealing strategy.
Residential vs. commercial projects: Core differences in installation requirements
The installation logic for residential projects (especially self-owned homes) and commercial engineering projects is fundamentally different:
- Residential projects: The installation unit is usually an individual or a small construction team, with poor on-site condition controllability, but the number of windows is small, allowing for fine handling of each window. The core focus is onthe drainage slope of the window sill, the filling density of the foam adhesive, the continuity of the sealant, and the aesthetic appearance of the interior finishing.After residential window installation, on-site air tightness testing is generally not performed, so the installer's workmanship habits are more critical than the test report.
- For engineering projects: batch installation with tight schedules, but usually there is supervision or third-party spot checks. The core focus is onWhether the spacing of fixing points is implemented according to the drawings, whether the connectors between profiles and walls are galvanized, and the overlapping sequence of the waterproof layer and the window frame. Project acceptance relies on spot-check data, so the consistency of installation across each window is more important than the precision of a single window.
For the 80 Series thickened single casement window, with a profile wall thickness of 1.8mm and reference configuration of 5+22A+5 insulating glass, the overall window weight is significantly greater than that of ordinary sliding windows. When installing in a residence, be sure to confirm whether the wall is solid brick, concrete, or lightweight block.—Lightweight block walls must use special expansion anchors or through bolts, and cannot be fixed with ordinary steel nails only; otherwise, the vibration from repeated opening and closing of the window sash will gradually loosen the fixing points.
High-rise and coastal environments: additional considerations for wind pressure resistance and corrosion resistance
Do high-rise residences require additional reinforcement? The answer is: yes, but not to reinforce the window itself, but to reinforce the connection nodes.
The 80 Series thickened profile with 1.8mm wall thickness has sufficient margin for wind pressure resistance in typical high-rise buildings (below 100 meters). The real risk points are:
- Number of fixing points: The high-rise recommendation is that the spacing between fixed points on each side frame should not exceed 400mm, rather than the conventional 500-600mm.The fixed points on both sides of corner windows and casement sashes must be reinforced.
- Connector strength: The thickness of the steel sub-frame or galvanized connecting plate should not be less than 1.5mm, and it must be connected to the structural layer of the wall, not just fixed to the plaster layer.
- Glass configuration: If the project is located above 30 floors or the local basic wind pressure exceeds 0.5kN/㎡, it is recommended to confirm with the current website team whether the 5+22A+5 configuration needs to be upgraded to tempered or laminated glass—this directly affects the safety of the glass under negative wind pressure.
What should be noted when installing aluminum alloy windows in coastal areas? The core challenge in coastal areas is the combined effect of salt spray corrosion and typhoon rainstorms.
This product uses 6063-T5 aluminum alloy profiles, and the corrosion resistance of the base material itself is at a conventional level among similar products. Coastal projects require three additional confirmations:
- Hardware material: In coastal environments, it is necessary to confirm whether hinges, locking points, and transmission rods have undergone salt spray testing (neutral salt spray test not less than 48 hours).This is the most easily overlooked shortcoming—the profiles are fine, but hardware corrosion can cause the window sash to sag.
- Sealant selection: Ordinary neutral silicone sealant should not be used; instead, weather-resistant sealant (with displacement capacity of ±25% or more) should be selected, and the sealant joint width should be calculated based on local typhoon and rainstorm intensity—it is not that wider is better.
- Drainage hole direction: Coastal rainstorms are often accompanied by strong winds, and drainage holes are easily blocked by backflow wind pressure.During installation, confirm that the drainage holes are located on the outside lower side of the profile and that the drainage cavity is not blocked—this should be verified during post-installation inspection by actually probing with a thin wire.
Common Questions
Q: For a high-rise residential building installing a 80 Series single casement window, is a profile wall thickness of 1.8mm sufficient? A: For heights below 100 meters and in conventional wind pressure zones, a 1.8mm wall thickness with reinforced fixing points (spacing ≤400mm) is sufficient. However, if the project exceeds 100 meters or is located in a typhoon-prone area, it is recommended to provide the current website team with the specific floor height and project location to confirm whether adjustments to the profile series or glass configuration are needed.
Q: For coastal projects using this window, is additional surface treatment required? A: The 6063-T5 aluminum alloy substrate itself relies on surface coating (powder coating or fluorocarbon spraying) to resist salt spray. When purchasing, please confirm the surface treatment method and film thickness with the current website team—fluorocarbon spraying (film thickness ≥40μm) is more suitable for high salt spray environments than ordinary powder coating.
If the project is within 1 km of the coastline, it is recommended to directly confirm the fluorocarbon option.
Q: Are the installation acceptance standards the same for residential and engineering projects? A: They are different. Residential projects mainly rely on the installer's workmanship and the owner's visual inspection, focusing on whether the sealant is continuous, drainage is smooth, and window sashes open and close smoothly.
Engineering projects usually have three performance test requirements: air tightness, water tightness, and wind load resistance. It is necessary to confirm in advance whether the project has testing indicators so that adjustments can be made in installation nodes and sealing processes in advance.
Q: Are there any special requirements for installing this window on lightweight block walls? A: Lightweight blocks (such as aerated concrete) have poor nail-holding capacity, so expansion bolts cannot be directly used. It is necessary to use through-wall bolts or through-bolts for fixing, or embed solid concrete blocks in the blocks before fixing.
Before installation, it is recommended to confirm the wall material to avoid potential loosening after installation.
Q: For a coastal high-rise project, does the drainage design of this window need to be modified? A: The drainage cavity design of the profile itself is fixed, but the orientation and number of drainage holes can be adjusted during installation. For coastal high-rise buildings, it is recommended to ensure that the drainage holes are located on the lower outside of the profile, with a diameter of no less than 5mm, and the number should be no less than 1 per 600mm of window width.
After installation, a water test should be conducted to verify smooth drainage and prevent backflow during heavy rain.
Learn More
If you are selecting the 80 Series thickened single-leaf aluminum window for a specific project, please provide information such as opening dimensions, wall type, floor height, and project location. Our technical team can assist in confirming the installation plan and configuration details.
Related Products:80 Series Thickened Single-Opening Aluminum Alloy Window